![Full Color.png]](https://learn.tryswivl.com/hs-fs/hubfs/Full%20Color.png?height=50&name=Full%20Color.png)
spot.is is a feature in the swivl platform that helps you create support pages for each of your storage facilities. These pages are branded for your business and make it easy for customers to get help, find answers, or access important links like payments and access codes.
Each spot.is page has a unique QR code you can print and post around your facility. When a customer scans the QR code, they're taken directly to that location’s support page - no searching or phone calls needed.
With spot.is, you can offer a consistent support experience across all your locations, even if they belong to different brands.
Create a Brand
Start by creating a brand that will be used to theme your spot.is pages. Learn more about how to add a brand in swivl here.
- Log into your swivl Dashboard.
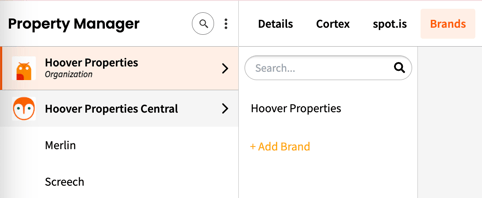
- Click the menu icon in the bottom-left corner, then select Property Manager.
- From the Organization select Brands.
-
Click +Add Brand and fill in the required details.
-
This brand will control the colors, logos, and overall styling of your spot.is page.
-
- Within the Brand settings, you'll also need to specify the Spot URL and the Spot Short Link URL.

ℹ️ These URLs are essential for ensuring your spot pages and QR Codes function correctly.
Set Up the spot.is Page for a Location
Once your brand is created, you’re ready to link it to a specific location:
-
Navigate to a Location Page (within a Group) for the Location you want to configure.
-
At the top of the page, click on spot.is.

Fill In Required spot Fields
-
spot Location URL: The full landing page link customers will visit.
- spot Location Short Link URL: A shorter, easy-to-share link (great for printing on signage and sending via SMS). Feel free to choose any short name you like!
- Adding a /qr at the end of the spot Short link redirects users to the "long" link with a QR code tracking parameter
-
(e.g.,
https://my.spot.is/hss/000/qr→https://my.spot.is/hoover-properties/merlin?utm_source=qrcode).
These URLs guide customers to a support page designed specifically for that location.

Assign the Brand
-
Use the Brand dropdown to select the brand you created earlier.
-
This applies the correct theme and styling to the page automatically.
Managing Multiple Brands
If you have multiple brands across different locations:
-
Repeat the above steps for each location.
-
Make sure each one is assigned the correct brand and has its own unique spot URLs.
-
The QR code only needs to be generated once - even if the URL changes later, it will still redirect properly.

Feel free to add, remove, or rearrange buttons based on what your store or location uses.
Add, Remove, or Rearrange Buttons
You can easily customize the layout of your spot page by adding, removing, or rearranging buttons.
- Add: Click the “+ Add Button” option to create a new button.
- Remove: Click the trash icon on any button to delete it.
- Rearrange: Drag and drop buttons to reorder them as needed.
This allows you to prioritize the most important actions and ensure a user-friendly experience for visitors.
Configure Button Settings
When you click on a button, a configuration panel will appear on the right-hand side. Here, you can:
- Add an icon that best describes your button
-
Edit the Button Title: This is the label users will see.
-
Add a URL: Specify the destination page you want users to be redirected to.
-
Select the Target: Choose whether the link opens in a new tab or within the current tab.
These settings give you full control over how each button behaves and how users interact with your spot Page.